GitHub Hexo Blog

githexo

什么是 Hexo

Hexo 是一个快速、简洁且高效的博客框架。Hexo 使用Markdown(或其他渲染引擎)解析文章,在几秒内,即可利用靓丽的主题生成静态网页。

安装前提

应用程序:

[^mark]: <<用作编辑markdown,根据个人喜好,比如mdpad>>

配置npm镜像源

npm全称Node Package Manager,是node.js的模块依赖管理工具。

由于npm的源在国外,配置源以淘宝源为例:

  • 临时使用
    1
    npm --registry https://registry.npm.taobao.org install express
  • 持久使用
    1
    npm config set registry https://registry.npm.taobao.org
    // 配置后可通过下面方式来验证是否成功
1
npm config get registry 
1
npm info express
  • 通过cnpm使用
1
npm install -g cnpm --registry=https://registry.npm.taobao.org
// 使用cnpm install expresstall express

taobao

安装 Hexo

1
$ npm install -g hexo-cli

#-g表示全局安装, npm默认为当前b安装

npm 基本指令

1
2
3
4
5
6
7
8
9
10
11
12
- 卸载全局安装模块  npm uninstall -g <package>

卸载后,你可以到去全局安装目录查看/node_modules/ 目录下查看包是否还存在,或者使用以下命令查看:npm ls

- 获取全局安装目录 npm config get prefix

- 查看所有全局安装的模块 npm ls -g

- 查看npm默认设置(部分) npm config ls

- 查看npm默认设置(全部) npm config ls -l

npm指令英文文档,如 :https://docs.npmjs.com

如需了解更多 npm docs page

问题

若在安装中遇到,提供的页面中有常见安装问题。

如果遇到相同问题,移步472

1
2
3
4
5
module.js:472
throw err;
^

Error: Cannot find module 'D:\Program Files\Git\node_modules\hexo-cli\bin\hexo'

hexo 建立默认站点

在我的电脑中建立一个名字叫「Hexo」的文件夹,然后在此文件夹中右键打开Git Bash。执行

1
$ hexo init

如果无法使用右击“Git Bash”,则可以切换到指定目录

1
$ cd i:/hexo

安装依赖包Hexo随后会自动生产建立网站所需的文件

1
$ npm install

开启预览访问端口(默认端口4000,’ctrl + c’关闭server)可选开启调试模式(即加上 –debug)

1
2
3
hexo s --debug #调试模式
hexo server

然后到浏览器输入localhost:4000。

一个默认的本地hexo站点完成。
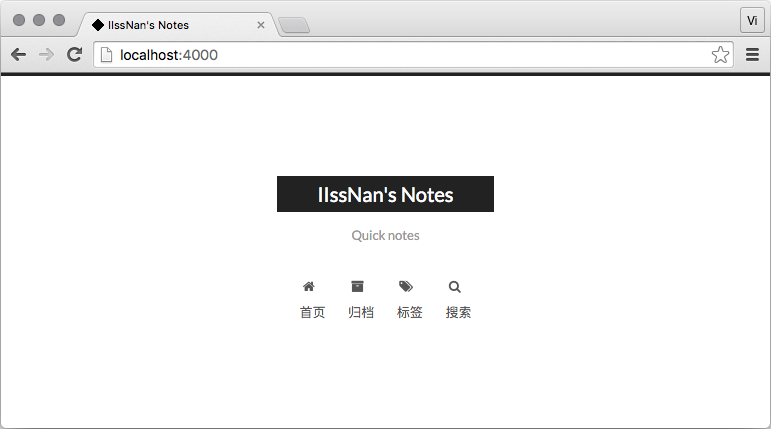
hexo

hexo切换主题

  • 安装主题

Hexo 安装只需要将主题文件拷贝至站点目录的 themes 目录下, 然后修改下配置文件即可。

在 Hexo 中有两份主要的配置文件,其名称都是 _config.yml。

_config.yml 位于站点根目录下

  • 启用主题

打开 _config.yml 找到 theme 字段 ,修改值为主题

1
theme: next

theme

在切换主题之后、验证之前, 我们最好使用 hexo clean 来清除 Hexo 的缓存。

  • 验证主题
1
hexo s

此时即可使用浏览器访问 http://localhost:4000,检查站点是否正确运行。

部署到github

  • 安装 hexo-deployer-git。
1
npm install hexo-deployer-git --save
  • 修改主配置文件_config.yml,
1
2
3
4
5
deploy:
type: git
repo: git@github.com:kinzun/kinzun.github.io.git
branch: master
# message: [message]

deploy

  • 生成静态文件
1
hexo generate
  • 快速部署
1
2
hexo deployer

同时执行,两条作用相同。

1
2
hexo generate --deploy 
hexo deploy --generate
  • 每次需要写博客可以使用
1
hexo n

soure文件夹下的_post文件夹下新建一个markdown文件.

1
2
3
4
5
6
7
8
9
10

首先我们需要检查你电脑上现有的ssh key:
$ cd ~/. ssh 检查本机的ssh密钥
如果提示:No such file or directory 说明你是第一次使用git。
生成新的SSH Key:
$ ssh-keygen -t rsa -C "邮件地址@youremail.com"
Generating public/private rsa key pair.
Enter file in which to save the key
(/Users/your_user_directory/.ssh/id_rsa):<回车就好>

.ssh/id_rsa.pub
登陆github系统。点击右上角的 Account Settings—>SSH Public keys —> add another public keys

注意 将私钥权限 设置 700 其他人无法访问即可。

1
2
3
4
5
6
7
8
9
10
11
12
13
14
15
chmod 700 id_rsa
测试
$ ssh -T git@github.com

Hi cnfeat! You've successfully authenticated,
but GitHub does not provide shell access.

验证成功

进行下一步,配置全局

$ git config --global user.name "cnfeat"//用户名
$ git config --global user.email "cnfeat@gmail.com"//填写自己的邮箱

SSH Key配置成功,本机已成功连接到github

hexo 常用命令

1
2
3
4
5
6
7
hexo new "postName" #新建文章
hexo new page "pageName" #新建页面
hexo generate #生成静态页面至public目录
hexo server #开启预览访问端口(默认端口4000,'ctrl + c'关闭server)
hexo deploy #将.deploy目录部署到GitHub
hexo help #查看帮助
hexo version #查看Hexo的版本

参考资料

hexo 官方文档

NEXT 主题文档

世平阜康

hexo搭建github博客

Git/Github使用方法小记

Node.js Docs

Markdown——入门指南

Markdown的常用语法

Markdown|让文本更加精致

主题推荐

手把手教你建github技术博客


本博客所有文章除特别声明外,均采用 CC BY-SA 4.0 协议 ,转载请注明出处!